Welcome to our Stamping With Friends Blog Hop featuring talented Independent Stampin’ Up! Demonstrators. Our theme this month is Loaded Envelopes. I hope you enjoy the variety of projects we have to inspire you. You may have hopped here from Helen Jennings blog, wasn't her project lovely! Where ever you began, the list of links for blogs on this Stamping With Friends Blog Hop is at the end of my post.

I have a special thank you to my friend and fellow demonstrator, Laurie Bradshaw, who kindly shared her tutorial for the loaded envelope with me. This was super fun and easy to create. I took lots of pictures as I was creating!
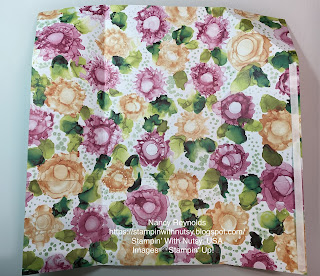
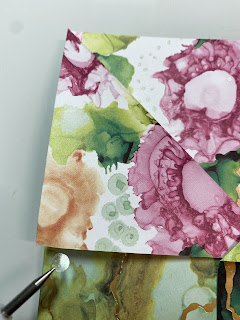
First, I chose my favorite Specialty Designer Series Paper, Expressions In Ink Specialty Designer Series Paper (and my favorite pattern in this package!) You will need a 12 x 12 in sheet of designer series paper in your choice of pattern and color. The top is not scored, you will score the left and right at 3 1/4 inches and the bottom at 3 3/4 inches.
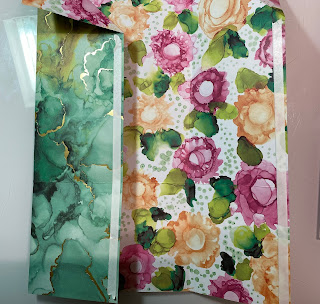
This is the inside of the envelope. All the scoring is completed.

The left and right sides fold over and the tops are folded into a “collar”.
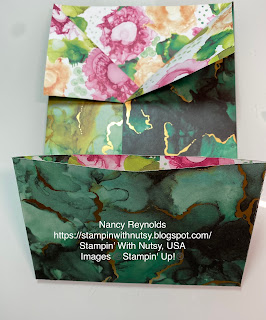
Here you can see that I’ve folded my “collar” down and the bottom up.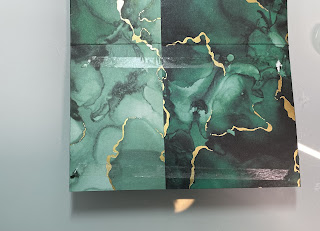

BLOG LINKS:
Tear and Tape is on the top and bottom of the flap that is folding up (this will create your second pocket.)
I tucked a little glue dot under the collar corner.
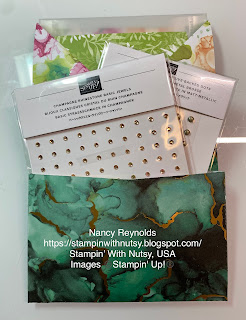
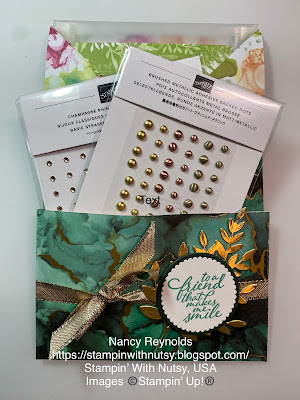
I made sure my goodies fit inside - I have DSP in one of the plastic envelopes that our dies come in the main envelope pocket and embellishments in the front pocket. Everything fits, now it needs just a little added to make it even prettier.
Here is my finished Loaded Envelope, I tied the gold shimmer ribbon around the bottom, cut the leaf (Forever Flourishing Dies) out of our Gold Sheet, added an Evening Evergreen Circle and sentiment using the Layering Circle Dies. The sentiment is from Forever Fern Stamp Set and is stamped in Just Jade.
I love reading comments and answering questions, please use the comment box below.
The next stop on our Blog Hop is Mickey Moore, just click the Next Blog button below.
Linda Moore
Melva Peters
Tricia Butts
Diane Evans
Helen Jennings
Nancy Reynolds
Mickey Moore
I am an Independent Stampin' Up Demonstrator in the United States and would be honored to be your demonstrator if you do not already have one. I am happy to help you with orders, online workshops, or welcome you to my team, Nutsy's Stampers.
SUPPLIES:
 Specialty Designer Series Paper")
")


 Shimmer Ribbon")


Lovely!
ReplyDeleteThank you 😀
DeleteThank you 😀
ReplyDeleteSo beautiful. I love it.
ReplyDeleteThank you for hopping with us.
Thank you Linda. And thank you for hosting the hop!
DeleteYour choice of paper with that beautiful gold foiling really adds to this lovely project
ReplyDeleteI do love my bling! I think this is my favorite dsp this year.
DeleteSo beautiful! Thank you for sharing you gorgeous take on the this project! I love the Expressions in Ink DSP with this! That gold foiling is perfect for a gift pouch!
ReplyDeleteThank you, bling is good! LOL, sometimes I get carried away. :-)
ReplyDeleteYour card are so wonderful and nice, have a wonderful day.
ReplyDelete