Wednesday, June 30, 2021

Journey to Silver Elite Blog Hop


Thank you for joining us for our Journey to Silver Elite Blog Hop. I hope you find ideas and creative inspiration as you visit all of the blogs. We are a group of stampin’ Up!® Demonstrators working together to help each other build a successful Stampin’ Up!® business and reach goals we have set. We really appreciate your support.

You may be starting here or have come from another blog - either way you can find the link list at the bottom of this post so that you can see every blog post and idea today. We really appreciate your support!

I created a get well card in the style inspired by Sandra Roberts and her 'Jigsaw Style" card. This is a great card layout when you want to use some of your bits and pieces of designer series paper (DSP). 

Our theme this month is something old (carried over from the January - June 2021 Mini Catalog), something new (from the 2021-22 Annual Catalog) and a new 2021-23 In Color.

My Carry over item is the Oval Occasions Double Punch, my new item is the Hand Penned Suite which features our 2021-23 In Colors, and my in-colors are Pale Papaya and Soft Succulent.


Here's all my supplies assembled and ready to use.


I cut the cardstock and designer series paper according to this chart:


Assembly Directions:
* Emboss Pale Papaya Cardstock with the Ornate Flower 3D Embossing Folder
* Adhere to cardbase using multipurpose glue
* Assemble your cardstock and DSP pieces, these are glued to the card front, the middle piece is adhered with dimensionals. 
*The sentiment is stamped on a scrap piece of Basic White and punched out with the Double Oval Punch, then adhered to the center raised section
* The flower is stamped with Tuxedo Black Memento ink onto Designer Series Paper and cut using the die
* Leaves are colored with Evening Evergreen Blends and Wink of Stella is liberally applied to the flower then is adhered with seal to the sentiment. 
* The inside is a Soft Succulent Layer with 1/2" DSP strips on the left and right sides.
* Envelope flap is decorated with DSP and a matching 1/2" DSP strip is glued to the front.

I hope you enjoy this style card and are inspired to try it yourself! 


In case you’ve gotten lost in the hop, here are the links.

BLOG HOP LINKS:

Nancy Reynolds

Stampin' With Nutsy

Nedine Dupree

Craft Lounge Creations

Janice Piechowiak

Creating Treasures with Janice

Cathy Rocca

From The Stamp Studio

Julia Mazur

Simply She Stamps

Libby Fens

libbystamps

Polly Crouch

Stamp with Polly

Tricia Butts

Tricia's Stamping Creations

Tracy Byers

Cards, Craft and Stamps

Terri Hartley

Rustic Barn Cards

Theresa Tucker

Tucker Topnotch Designs

Sue Kremer

North Star Stamper

Kelly Taranto

The Late Night Stamper

Tammy Gill

Stampinkspired

Linda Moore

Moore Fun Stamping

Debra Norton

Stamping By The Lake

Jane Proffitt

Gal Friday Stamping

Sharon Jacobs

Stamped Inkspired Designs

am an Independent Stampin' Up Demonstrator in the United States and would be honored to be your demonstrator if you do not already have one. I am happy to help you with orders, online workshops, or welcome you to my team, Nutsy's Stampers.

SUPPLIES:
Product List


Monday, June 21, 2021


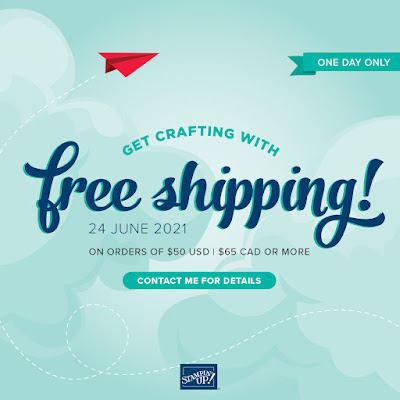
I’ve got exciting news! As you can from the picture - June 24, 2021 Shipping will be FREE on orders over $50.00.

I don’t know about you, but I LOVE free shipping! Don’t miss out! Click the picture and you’ll go directly to my store.

Happy Crafting!

Monday, June 14, 2021

Kylie Bertucci Demonstrator Training Blog Hop - June 2021


/

Thank you for joining us for our Stampin' Up!® Demonstrator Training Program Monthly Blog Hop! I hope you find ideas and creative inspiration as you visit all of the blogs. We are a group of Stampin' Up!® Demonstrators from around the world that are taking part in training that is helping us to build a successful Stampin' Up!® business and reach some goals we have set. We really appreciate your support.

You may be starting here or have come from another blog - either way you can find the link list at the bottom of this post so that you can see every blog post and idea today. We really appreciate your support!

In our busy world it is sometimes difficult to remember to send thank you cards! By preparing cards early in the month we’ve got them on had to send to customers. It feels great to be prepared!


I absolutely love the Sand and Sea Dies - I used the large one as my focal image. The Pearlescent Specialty Paper has a lovely shimmer. It is more ivory than white or vanilla so I chose Very Vanilla Thick Cardstock for my base. 


All the bits and pieces are ready to go: Notice the inside is Very Vanilla cardstock adhered to a slightly larger piece of Night of Navy cardstock. I added a strip of the Sand and Sea Designer Series Paper (DSP) to the bottom then adhered to the inside of my card.

The front focal piece is Night of Navy cardstock with the Sand and Sea DSP adhered with Seal adhesive. I used Pearescent Specialty Paper for the die cut; first I cut it out then embossed it with the Seashell 3D Embossing folder. I decided the seashells could use a little sparkle so applied Wink of Stella liberally. I took a picutre, hoping it will show up a little. 


The Thank You sentiment is from the Timeless Tropical stamp set and is stamped with Night of Navy ink on Very Vanilla cardstock. I cut another piece out of a Night of Navy cardstock scrap to put behind the sentiment. 

Time to assemble: 

Adhere the seashell focal piece to the DSP for the front. I put a strip of Very Vanilla Scalloped Ribbon across the top, adhering the sides to the back of the Night of Navy cardstock. Using dimensionals, adhere to the card front. 

I adhered the sentiment to the Night of Navy die cut with multipurpose glue. Added dimensionals to the back on the corners to adhere over the ribbon. The sentiment is very stable adhered to the cardstock and ribbon instead of only the ribbon.

I added a bow beside the sentiment and lots of Rhinestone Gems.

Cutting Dimensions


Cut

CM


CM

Inch


Inch

Card base

1

14.9

x

21

x

First layer

2

14.6

x

10.2

5 3/8

x

4 1/8

Designer Series Paper

1

14.4

X

10

5 ¼

X

4

Inside Second Layer

1

14.4

X

10

5 ¼

X

4


BLOG HOP LINKS:


am an Independent Stampin' Up Demonstrator in the United States and would be honored to be your demonstrator if you do not already have one. I am happy to help you with orders, online workshops, or welcome you to my team, Nutsy's Stampers.


SUPPLIES::

Product List