

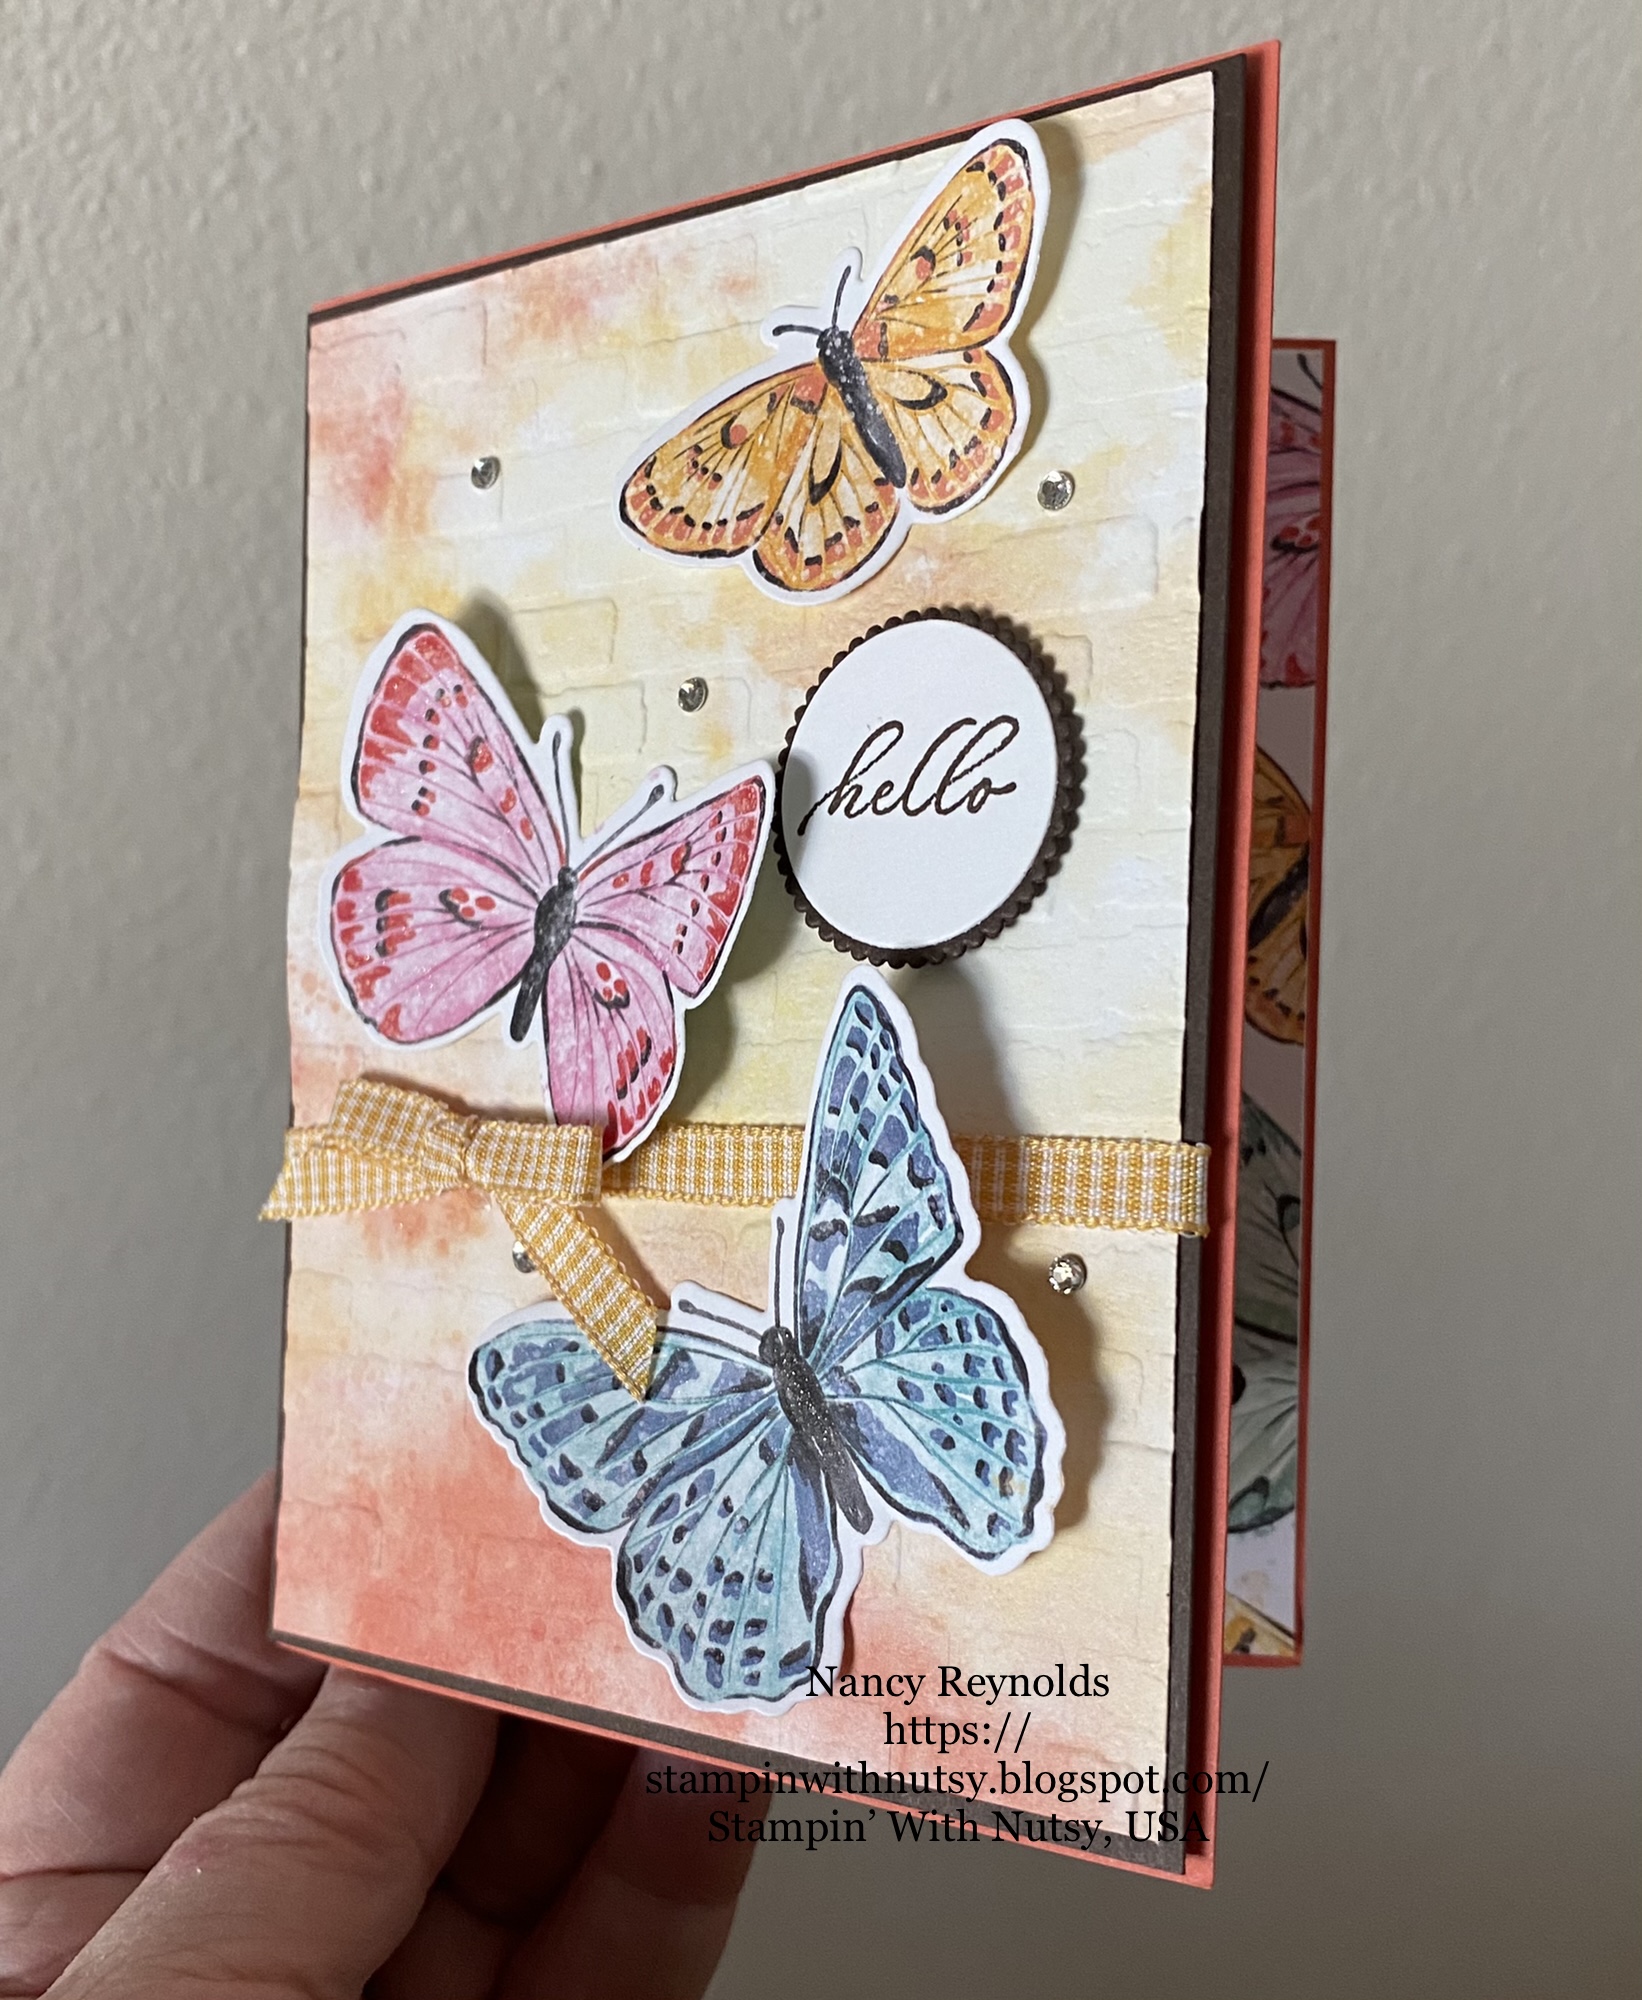
I began with a cardbase in Calypso Coral, I'll put measurements below for imperial and metric. I added a layer of Early Espresso Cardstock and a piece of Designer Series Paper from Butterfly Bijou. Sadly this DSP is no longer available in the USA. However, you can make a lovely background piece using Stampin' Up!® inks and the new blending brushes.
I ran the DSP through the Stampin' Cut and Emboss machine using the Brick and Mortar 3D Embossing folder to add texture and dimension. I adhered the DSP to the Early Espresso layer using Multipurpose Glue, then ran a strip of Seal along the back sides and adhered the ribbon in Bumblebee to the back on the edges. I then adhered these two layers to the Calypso Coral Cardbase.
I love the Butterfly Brilliance Stamp set and the coordinating dies, Brilliant Wings. You can stamp with Memento Ink and color with Blends, although I still had the Bijou DSP and cut the butterflies from that; I used a little Multipurpose glue to adhere the butterflies to the card front; I only put the glue on their bodies so the wings, carefully curled a little for texture and dimension.
To finish the card front I tied a small bow in the Bumblebee ribbon and used a glue dot to adhere it to the ribbon. I liberally applied Wink of Stella to the wings (the more sparkle, the better, in my opinion) and rhinestone gems to finished off the card.
The sentiment is stamped in Early Espresso ink onto Basic White cardstock, then cut out with the smallest layering circle die. I cut the smallest layering circle die scallop out of Early Espresso cardstock. I used a glue dot to adhere the hello (from Timeless Tropical stamp set) to the scallop and then used dimensionals to adhere it to the card front.
A piece of basic white is glued onto the inside with a strip of designer series paper on the side. I also put a strip of designer series paper on the envelope front.
Measurements:
Layer 1: (Cardbase) - either Imperial or Metric - 1/2 sheet of cardstock, scored and folded in 1/2.
Layer 2: (Early Espresso) - Imperial - 4 1/8" X 5 3/8" or 10.3 cm X 14.6 cm
Layer 3: (DSP) - Imperial - 4" X 5 1/4" or 10 cm X 14.4 cm.

Blog Hop Links:
Supplies:
Product List

")


 Designer Series Paper")


Very pretty!
ReplyDeleteFabulous card Nancy! Love the textured DSP, really adds to the whole card! :)
ReplyDeleteSo fun with the brick on the top, thx for sharing your inspiration
ReplyDeleteLove the colors! Thanks for sharing.
ReplyDeleteVery pretty card Nancy! Thank you for taking part in our Butterfly Bouquet Demonstrator Training Blog Hop this month.
ReplyDeleteLovely card! Love how you embossed the DSP!!😊
ReplyDelete